The bathrooms are the most important spaces in houses. They are the only space in your house that all the members of the households use everyday. they provide our physical and mental wellbeing while we are having our time for our cleaning. So for hygiene or for decor style reasons, they are the most renovated rooms of the houses for a lot of reasons.

How can you remodel your bathroom? We remodel a bathroom design in Edinburgh and I will explain the remodelling of bathrooms with this example. If you remodel your bathroom either by outsourcing or by DIY, there are four basic steps to follow:
1- Planning, budgeting and scheduling
2- Designing the concept and technical drawing
3- Doing the construction works
4- Finalising with the finishing touches

How to start your bathroom remodel
The remodelling bathroom starts with planning, why you need the remodelling and determining the scope of the project. The budget and time, design concept and technical details and workmanship are the main pillars to decide before going into a deep surf for inspirations and dealing with the technical details of the project. Whether you like to use a builder or you like to do your full DIY bathroom project, these main points carry almost same importance,
Our client need lives in single storey bungalow house type in Edinburgh. He need a new bathroom as he works as a home-office psychological consultant. Since his clients visit his house more often, he decided to shine his bathroom for both his clients and himself.
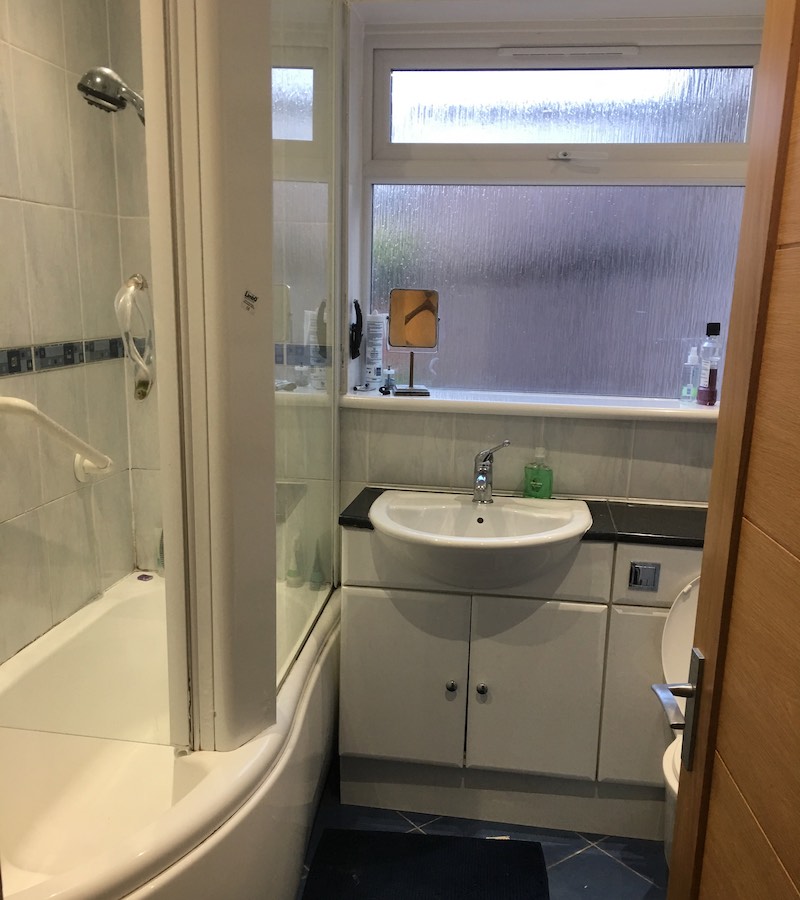
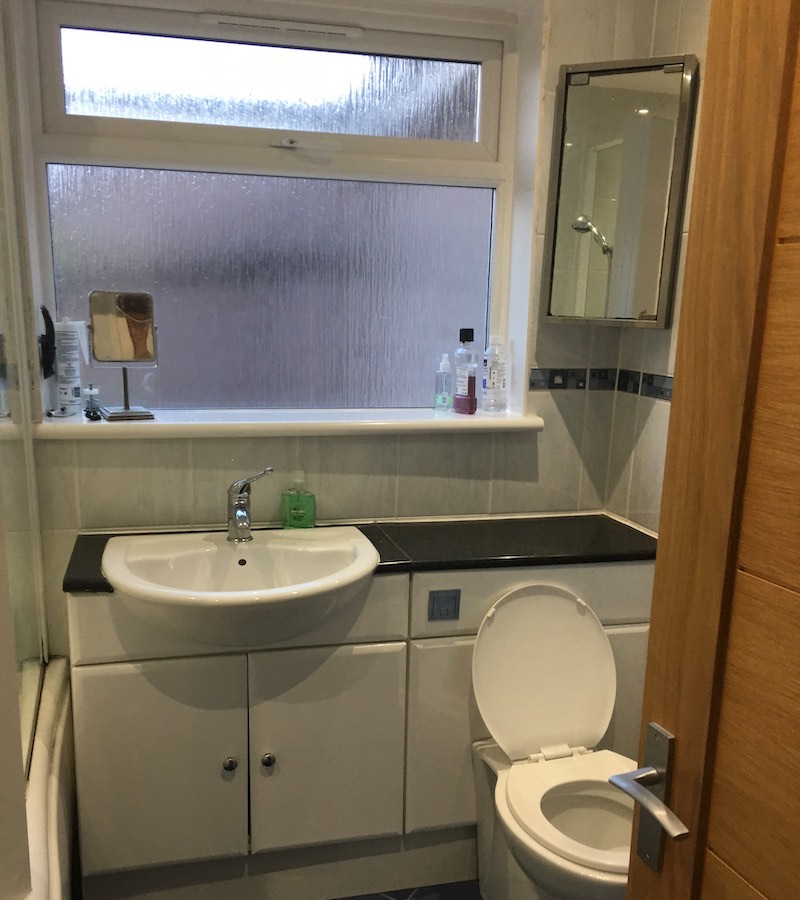
The existing bathroom had the 1980s style. The sanitary units were old-fashioned and the floor coverings weren’t in good repair. The bathroom layout wasn’t functional for our client’s needs. The contemporary tiles were in good condition, however they were not the style that our client likes.

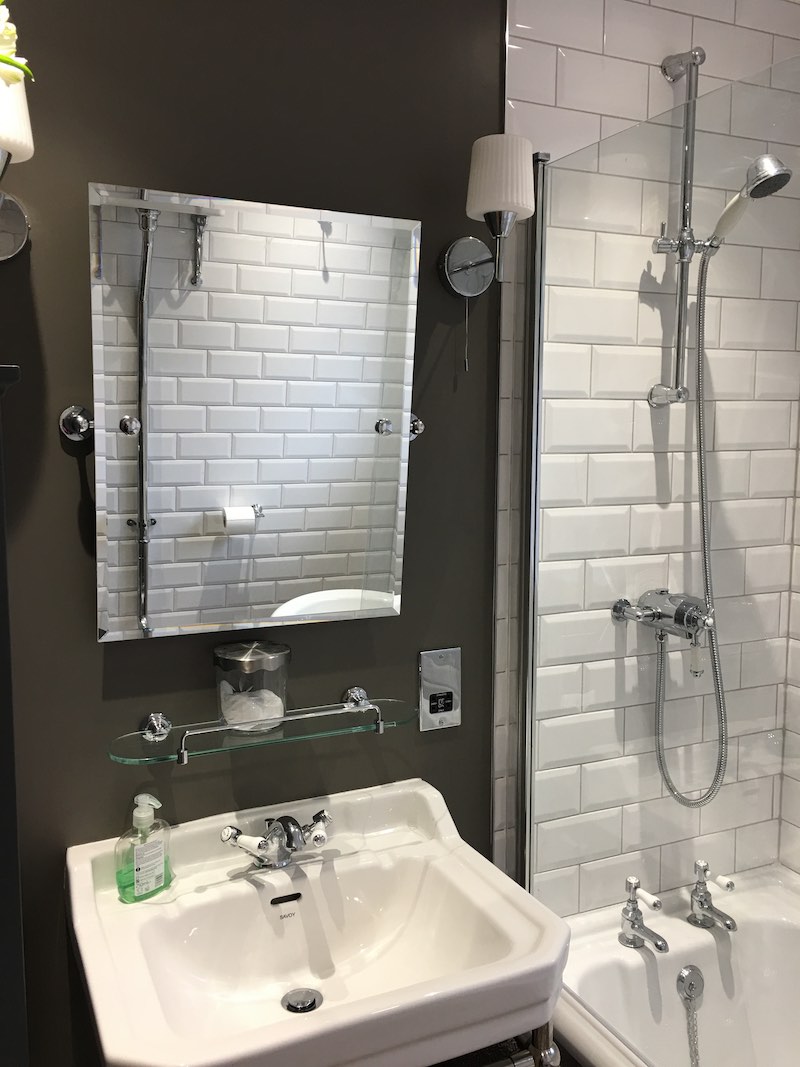
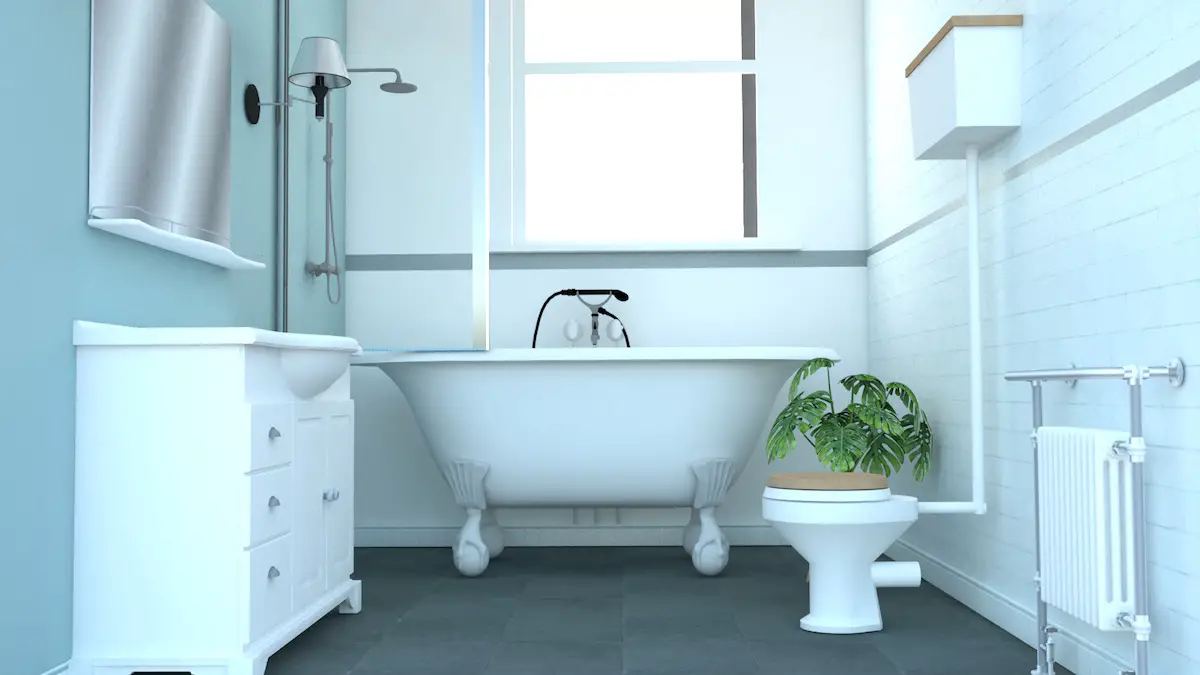
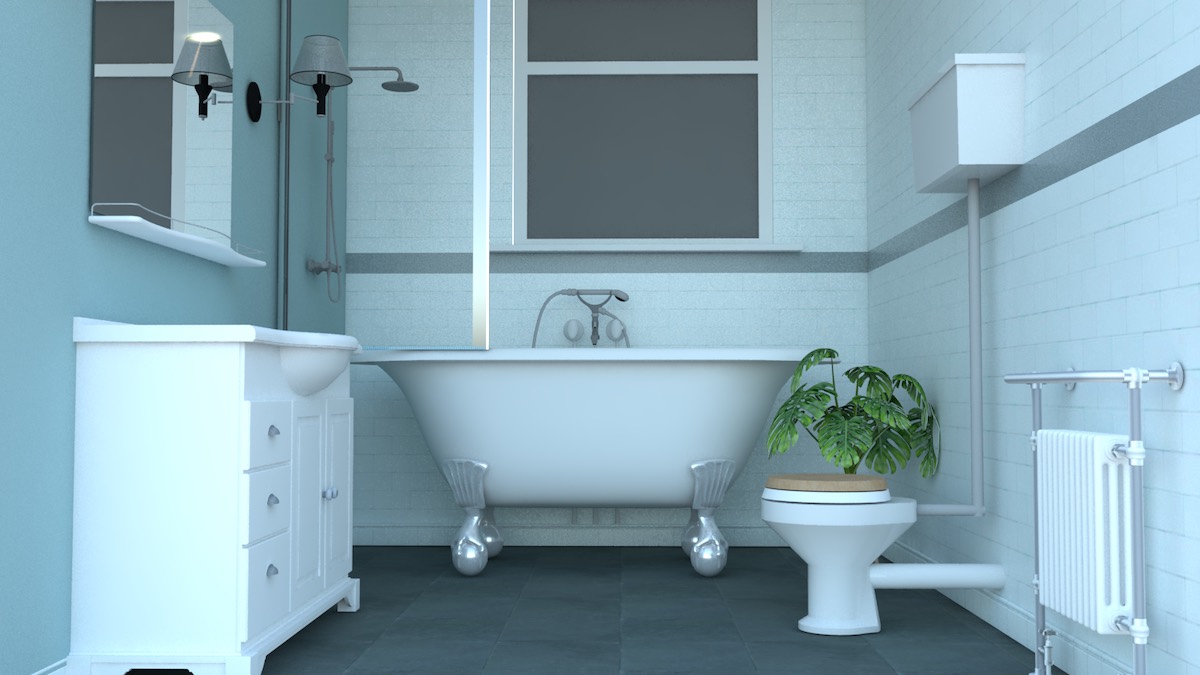
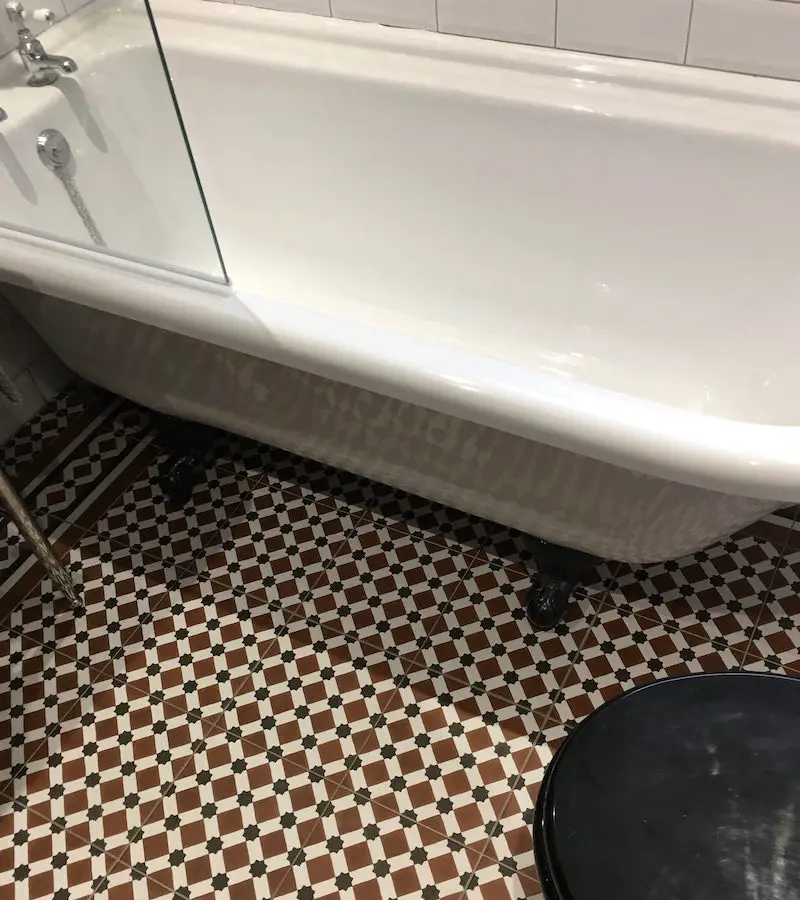
After initial talks with our clients, we discovered his style as Victorian traditional with a modern twist. We created a traditional bathroom that, while small, had all the vanity facilities such as bath with shower, sink with metal shelf, toilet with traditional cistern and a high bath cabinet. The subway/metro tiles for the wall are in harmony with the Victorian floor tiles.
To reach this end, we first learned his budget. Despite the fear that designers and architects cost, we on the opposite saved money for out client. The plan and scheduling from the early beginning, instead of informal chat with the builders and ended in more costs than the initial talk.

1-Planning, budgeting and scheduling
Your plan starts with what is your budget for your bathroom that determines everything about your design. You should think the cost of design, products and workmanship. For the design I suggest that you should hire an interior designer. You can do the design by yourself, if you have some interest in architectural design and have a tight budget. Otherwise it is good to have professional help.
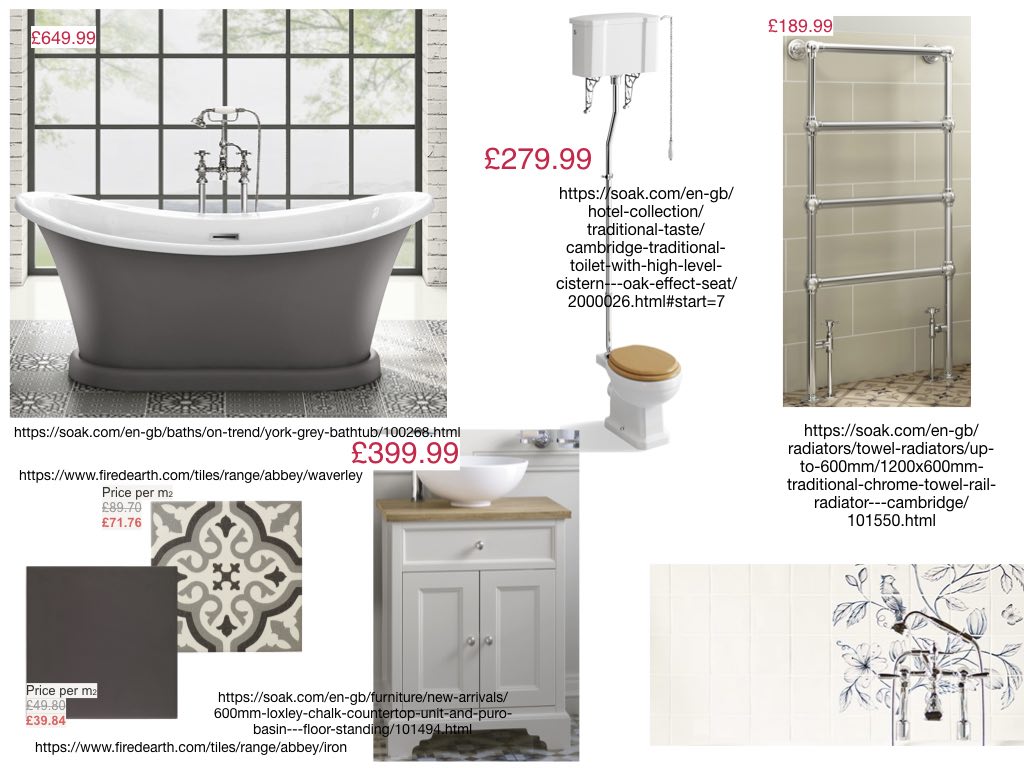
The budget covers the expenses of products that you will choose for your bathroom. There are variety of products from low and mid range to high end. with the help of a professional designer you may have more discounts for these products. You can also wait the sale times.

The budget includes the construction cost. If you have time, you can go with DIY option. However, most of us working busy and time is important for us. Hire professionals for plumbing, electricity and joinery works.

If you have a tight budget, it is important to source from variety of suppliers to find the best prices of each. With the initial search for the products, now time to set the design concept.

2- Designing the concept and technical drawing
The design phase starts with getting inspirations from any sources such as journals, Pinterest, instagram and all social media. Create a folder and boards for mood board. Mood board is the design concept sheet that you present your likes. For instance we create pin board for our client and select images for the final look.

Technical Drawings
If you have a tape measure at home, it is easy to get the dimensions of your bathroom. The builders are usually in a hurry to start the job, however it may cause mistakes that cost you money and time. There are many computer softwares, or online designers that you can find affordable options. If you are not keen on computer, you can draw a free-hand sketch.

It is important to have a scale drawing when you place the bath, toilet and furniture in the bathroom. The important thing is to place all items in a scaled proportion that you will see how much space you need in your bathroom. If you make a mistake in their scale, the bath, sink or toilet will not fit in the existing situation.
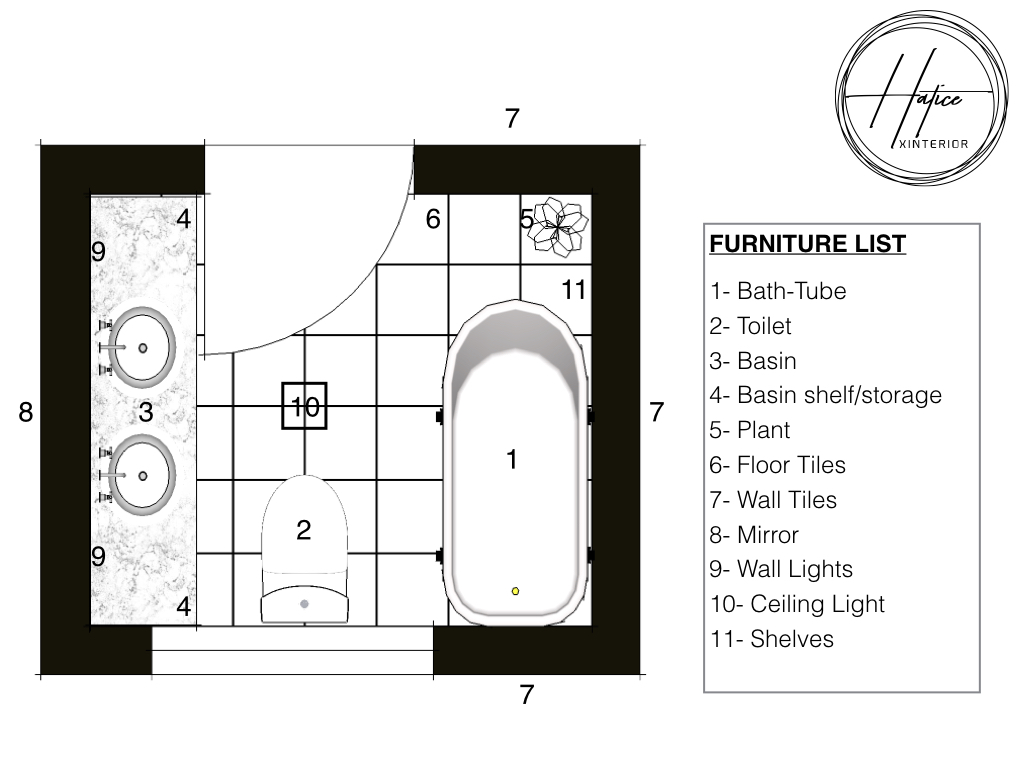
In our design after getting the survey of the existing bathroom, we created scale to fit drawing in drawing programme. The printed template is good for you to try alternatives.

After drawing your sketch, it is good to have numbers for all the items you need to buy for a budget break down. These floor plans show the furniture layout for our client. The numbers give the feasibility to check products in all phases from ordering to the construction.

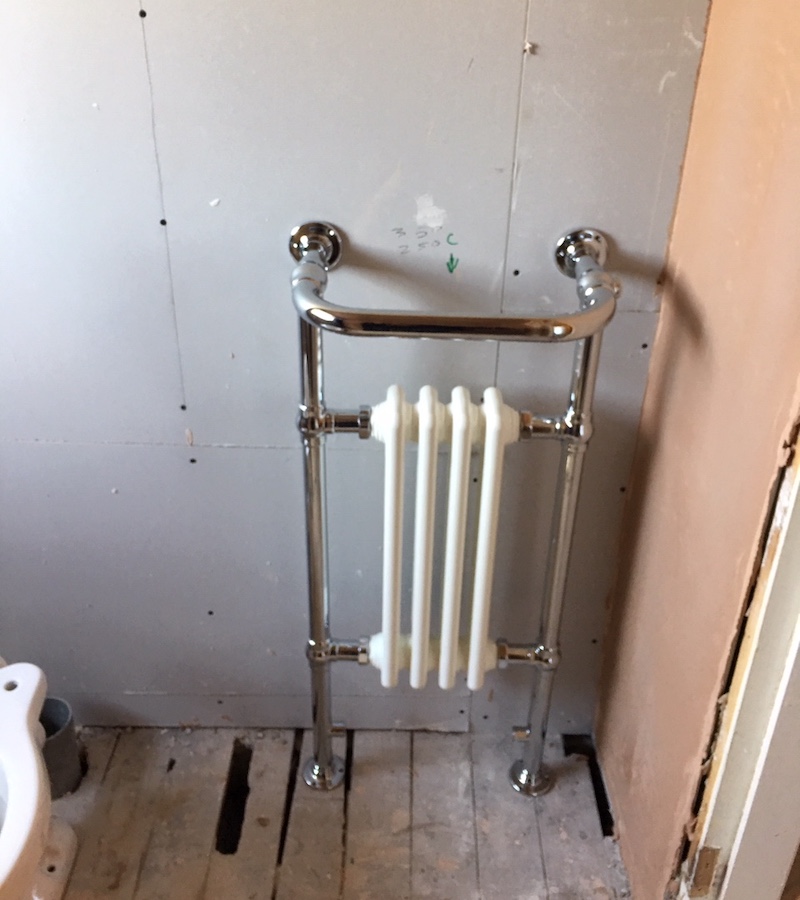
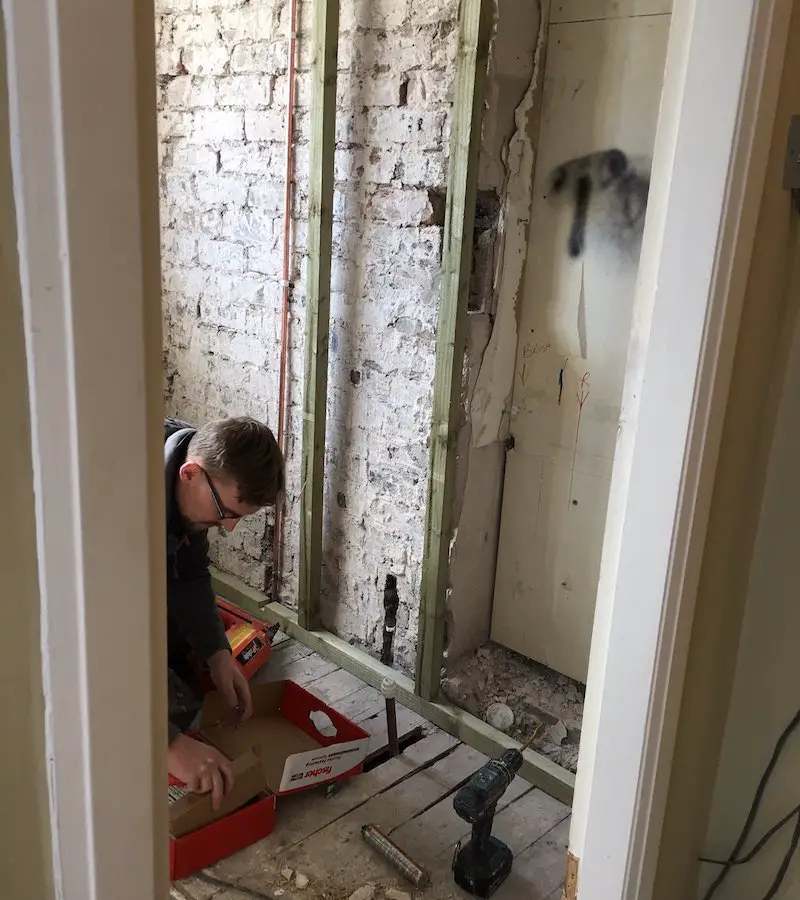
3- Doing the construction works
The construction works start with the demolition of the old sanitary appliances, tiles, walls, partitions and structural elements if you have to to enable the new design. The second part is the rebuilding works for the new design.

Plumbing works


Electricity works


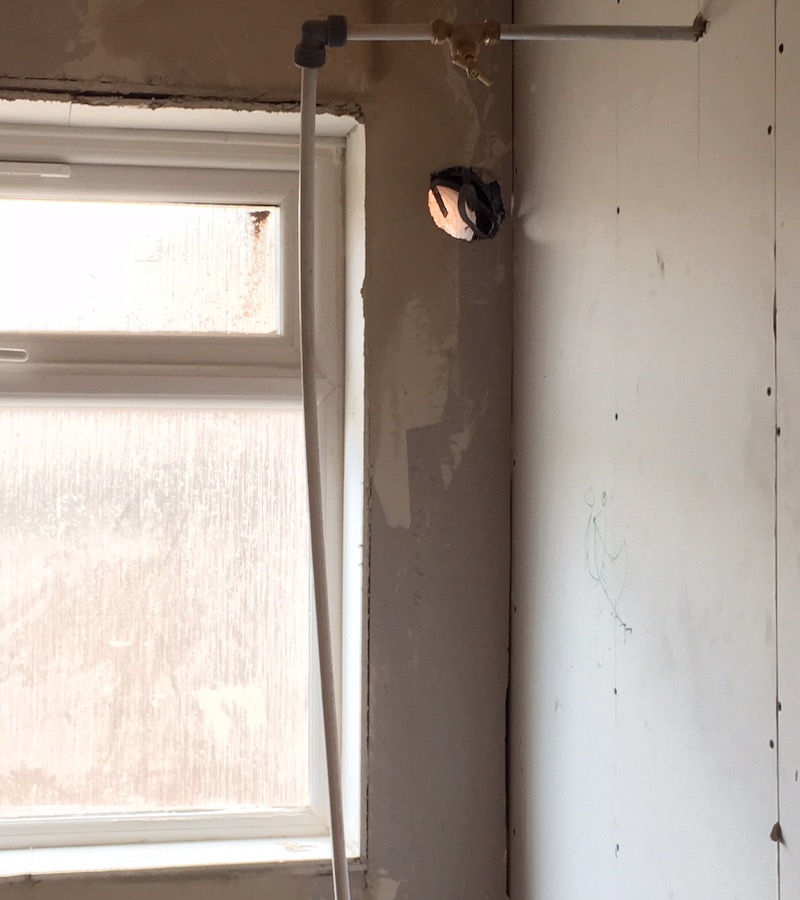
Joinery works
Tile works


Plastering and painting works


4- Ending with the finishing touches
The sanitary installations and final accessories such as flowers, hooks etc. are the finishing accessories for a bathroom.

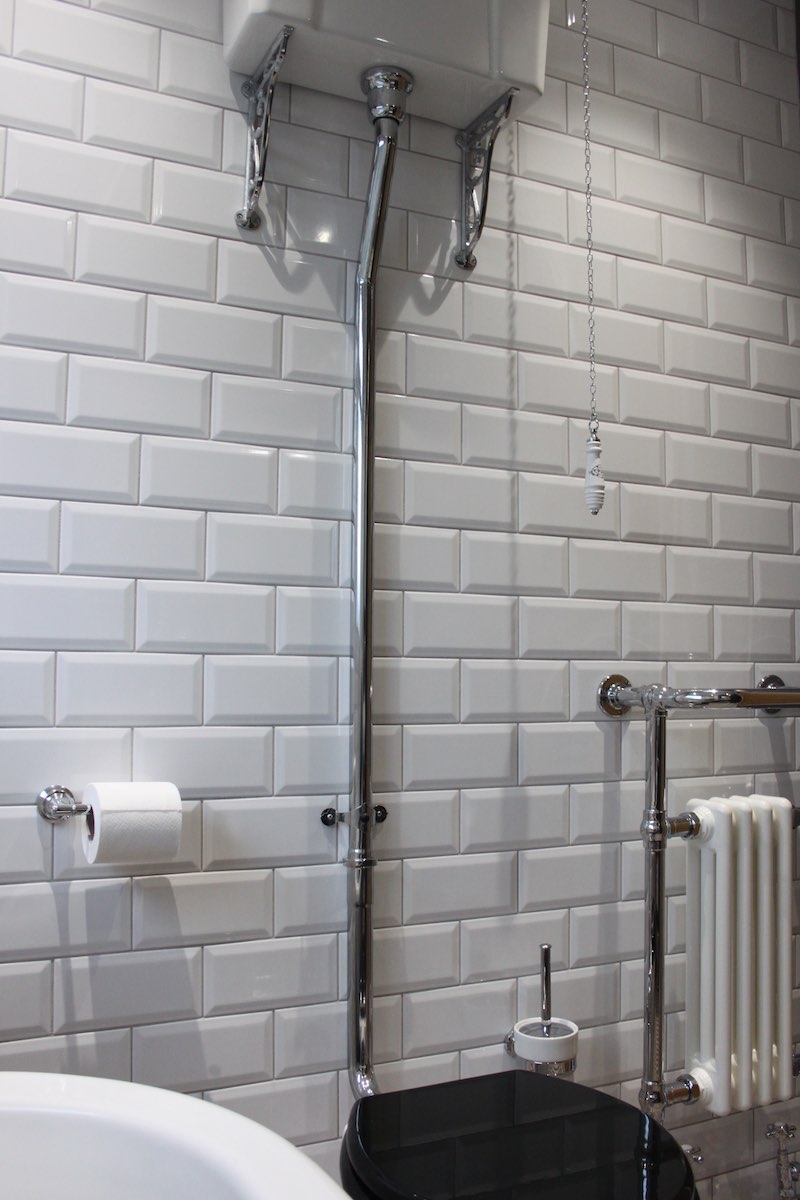
Final photos